CKEditor is a HTML editor. Highlight.js is a syntax highligting tool. This article will introduce the implementation of both in ASP.NET.
First download CKEditor 5 from their website:
https://ckeditor.com/ckeditor-5/download/
The code blocks plugin is needed. The easiest way to include it is by creating and downloading the “custom build“. Alternatively, you can download the code blocks plugin separately and add it later during initialization of the editor in HTML page.
It’s very easy to use CKEditor 5. After download, extract and include one single file “ckeditor.js” into your project solution. Hold on, wait a minute, just one file? Yes, that is all you need to start using CKEditor 5. It’s easier than setting up CKEditor 4. Yepe.
At your ASP.NET/HTML page, add a textarea element.:
<textarea class="editor"></textarea>or
<asp:TextBox ID="txtEditor" runat="server" TextMode="MultiLine" CssClass="editor"
ValidateRequestMode="Disabled"></asp:TextBox>
Remember to apply the attribute of ValidateRequestMode="Disabled", or else you will not be allowed to send HTML content back to the server. For security issue, ASP.NET server blocks user inputs HTML content by default.
And forget about styling the textarea, it will not be applied by CKEditor 5.
Use CSS to set the height of CKEditor 5:
.ck-source-editing-area,
.ck-editor__editable {
    min-height: 400px;
}

.ck-editor__main {
    height: 400px;
    overflow-y: scroll;
    border: 1px solid #bbbbbb;
}
Next, include the javascript source file ckeditor.js and put the initialization code below the textarea:
<asp:TextBox ID="txtEditor" runat="server" TextMode="MultiLine"
    CssClass="editor" ValidateRequestMode="Disabled"></asp:TextBox>

<script src="/CKEditor5/ckeditor.js"></script>
<script>
    ClassicEditor
        .create(document.querySelector('.editor'), {
            licenseKey: '',
            toolbar: {
                shouldNotGroupWhenFull: true
            },
        });
</script>
Done. Just like that.
Click on the “Code Block” icon to insert code.
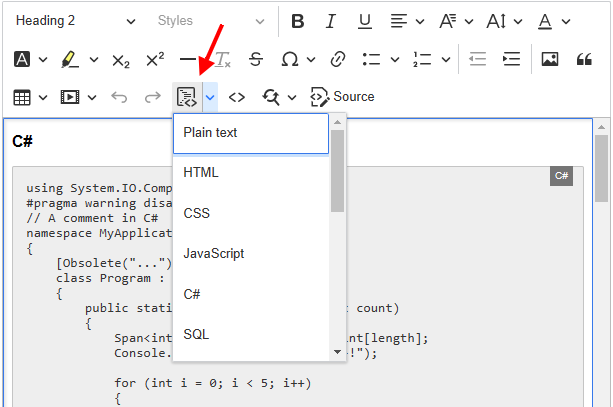
In order to add the programming language that you need, you can add it during the initialization of the editor. Besides, the default code indentation is “/t“, represent a “tab“, which might not be the common pratice for certain programming environment. You can set your desire indentation at codeBlock.indentSequence to 4 white space (for example) as shown below:
<script>

    ClassicEditor
        .create(document.querySelector('.editor'), {

            licenseKey: '',

            toolbar: {
                shouldNotGroupWhenFull: true
            },

            codeBlock: {
                languages: [
                    { language: "plaintext", label: "Plain text" },
                    { language: "html", label: "HTML" },
                    { language: "css", label: "CSS" },
                    { language: "javascript", label: "JavaScript" },
                    { language: "cs", label: "C#" },
                    { language: "sql", label: "SQL" },
                    { language: "json", label: "JSON" },
                    { language: "c", label: "C" },
                    { language: "cpp", label: "C++" },
                    { language: "diff", label: "Diff" },
                    { language: "java", label: "Java" },
                    { language: "php", label: "PHP" },
                    { language: "python", label: "Python" },
                    { language: "ruby", label: "Ruby" },
                    { language: "typescript", label: "TypeScript" },
                    { language: "xml", label: "XML" }
                ],
                indentSequence: "    "
            }

        });
</script>
At code behind, the output can be obtained like this:
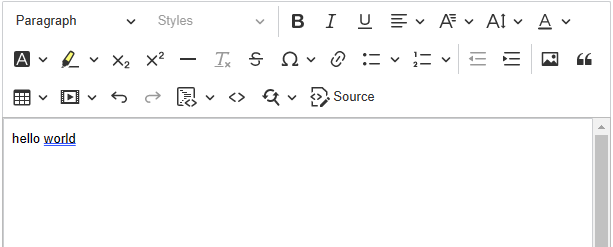
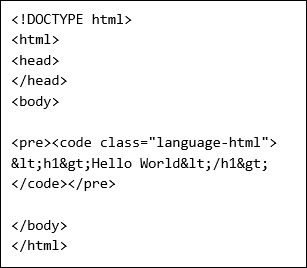
string output = txtEditor.TextExample of input:
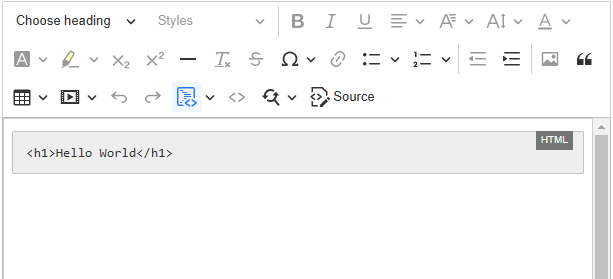
Example of output generated by CKEditor 5:
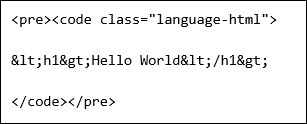
The output of text can be loaded on another page, for example:
Highlight.js – Syntax Highlighting
CKEditor 5’s code blocks plugin does not include real-time syntax highlight bu default.
We can use Highlight.js (a javascript syntax highlighting tool) to highlight the output text generated by CKEditor.
Download Highlight.js at: https://highlightjs.org/
Extract and add the following files into your project:
highlight.min.js- your favorite css theme files (located in the folder “
styles“)
To start using Highlight.js, add a theme file (obtained from the download) into the page, for example:
<link href="/highlight.js/styles/vs2015.min.css" rel="stylesheet" />Add 2 lines of javascript at the bottom of page to run highlight.js:
<script src="/highlight.js/highlight.min.js"></script>
<script>hljs.highlightAll();</script>
Done. Just like that.
Displaying Language Type and “Copy” Button
Example (at right top corner):
A plugin called “HighlightJs Copy Badge” can be installed to enable this feature. Written by Rick Strahl.
By default, this plugin uses a “Copy” icon from Font Awesome. However, you can override this with any images. Below show the simplest default setup to use this “Copy Badge”.
Include the following CSS link to import Font Awesome:
<link href="https://stackpath.bootstrapcdn.com/font-awesome/4.7.0/css/font-awesome.min.css"
 rel="stylesheet" />
Include the following javascript file obtained from Rick Strahl github site:
<script src="highlightjs-badge.min.js"></script>Execute the code as shown below. Due to it has to be run after the main “highlight.js”. Therefore, we can include a timer to delay the execution:
// wait for the page to fully loaded
window.onload = new function () {

    // set a timer to delay the execution
    // for waiting highlight.js to complete
    setTimeout(function () {
        window.highlightJsBadge();
    }, 100);
}
Done! and.. yupe just like that.
The styling of the “language type and copy button” block can be override with the following css:
/* The "copy" box container */
.code-badge {

}

/* The "copy" button */
.code-badge-copy-icon {

}

/* The "copy" button, after clicked */
.text-success {

}

/* The text in the container */
.code-badge-language {

}

/* The "copy" box container, at mouse hover */
.code-badge:hover {

}

/* The text in the container, at mouse hover */
.code-badge:hover .code-badge-language {

}
Example of styling overide:
/* The "copy" box container */
.code-badge {
    background: #555 !important;
    padding: 8px !important;
    opacity: 0.5 !important;
    transition: opacity linear 0.5s !important;
}

/* The "copy" button */
.code-badge-copy-icon {
    font-size: 1.3em !important;
}

/* The "copy" button, after clicked */
.text-success {
    color: #b6ff00;
}

/* The text in the container */
.code-badge-language {
    margin-right: 10px;
    font-weight: 700 !important;
    color: #ffafaf !important;
    transition: color linear 0.5s !important;
}

/* The "copy" box container, at mouse hover */
.code-badge:hover {
    opacity: 1 !important;
    background: #4f4f4f !important;
}

/* The text in the container, at mouse hover */
.code-badge:hover .code-badge-language {
    color: #ff4343 !important;
}
Done.
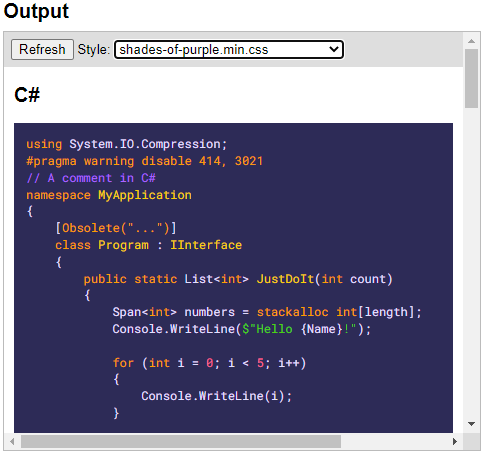
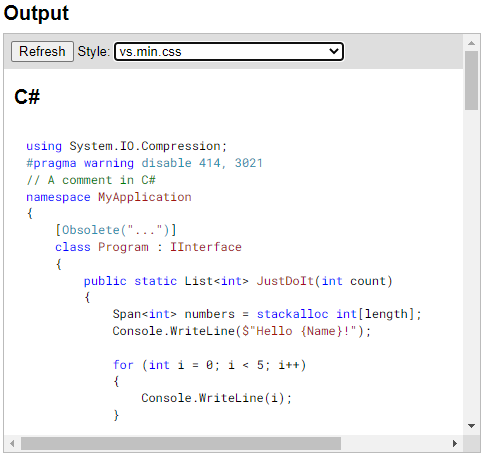
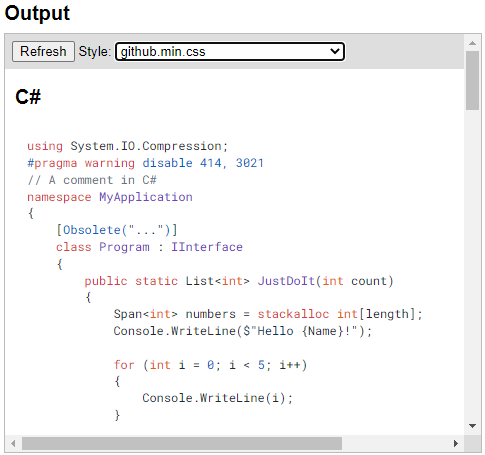
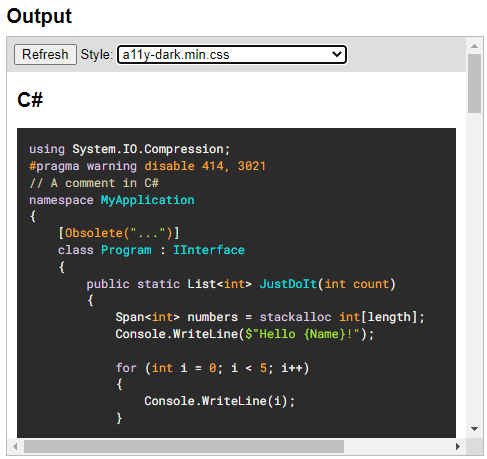
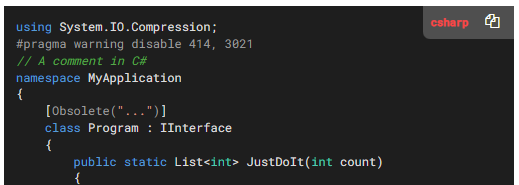
Below are some of Highlight.js rendering results: