Github (Source Code): https://github.com/adriancs2/android.webview.upload.download
References:
- “Android WebView with Download, Upload, JavaScript Alert, and HTML5 Video Support“
– written by Isrg KB Web Team - Android Developer Documentation
- Build web apps in WebView (Android Documentation)
- [Youtube] How To Create WebView App In Android Studio
Converts Website into Android Web App.
This article demonstrates one of the ways to build an Android Web App that support uploading and downloading files.
I’ll be using the Android Studio and Java in this article.
First, download Android Studio from the official site:
https://developer.android.com/studio
At the time of writing this, I’m using the latest version which is: Android Studio Electri Eel | 2022.1.1 Patch
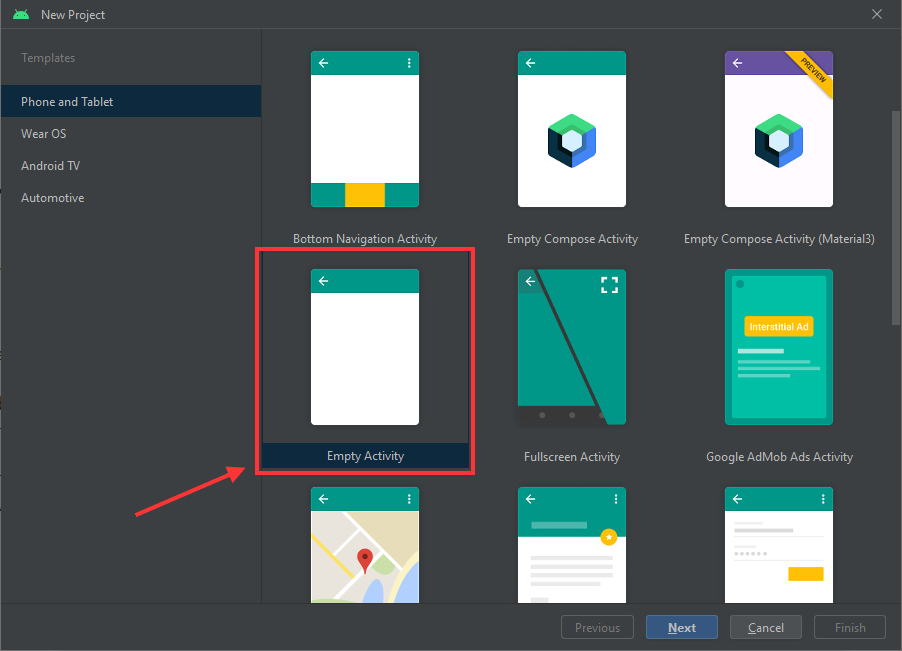
At Android Studio, create a new “Phone“project, select “Empty Activity” template.
Fill in basic project info:
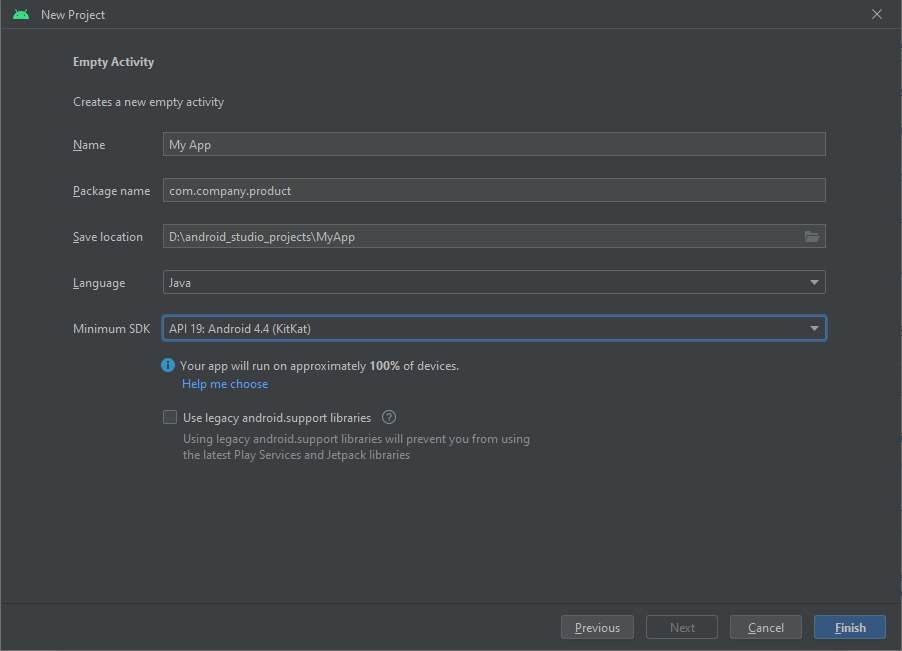
Read about “Package Name“.
Depands on your application needs, if you wish your app to be able to run on most Android devices, select “API 19: Android 4.4 (KitKat)” (info is based at the time of writing this).
Language: Java (This article will use Java)
Click “Finish” to start creating the app.
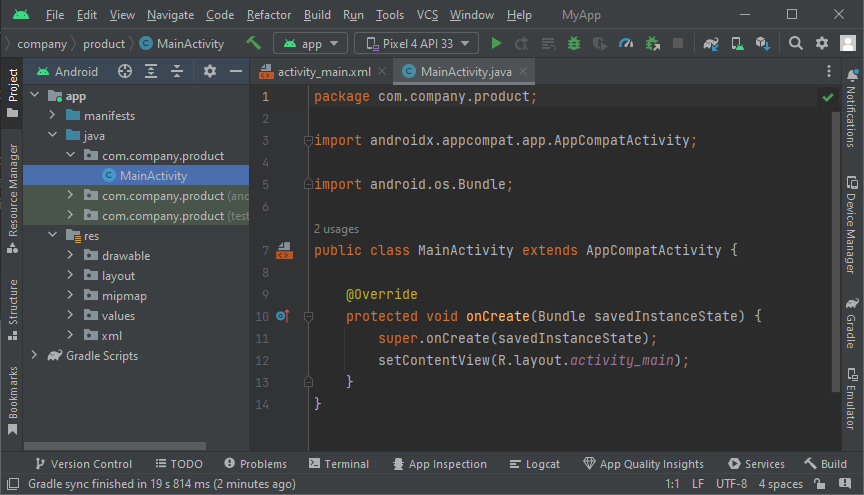
Wait for a moment for Android Studio to load and creates project files. Upon ready, you should be able to see something like this:

Setup App Icons
Before continue, we may first setup the App Icons (*You can do this later).
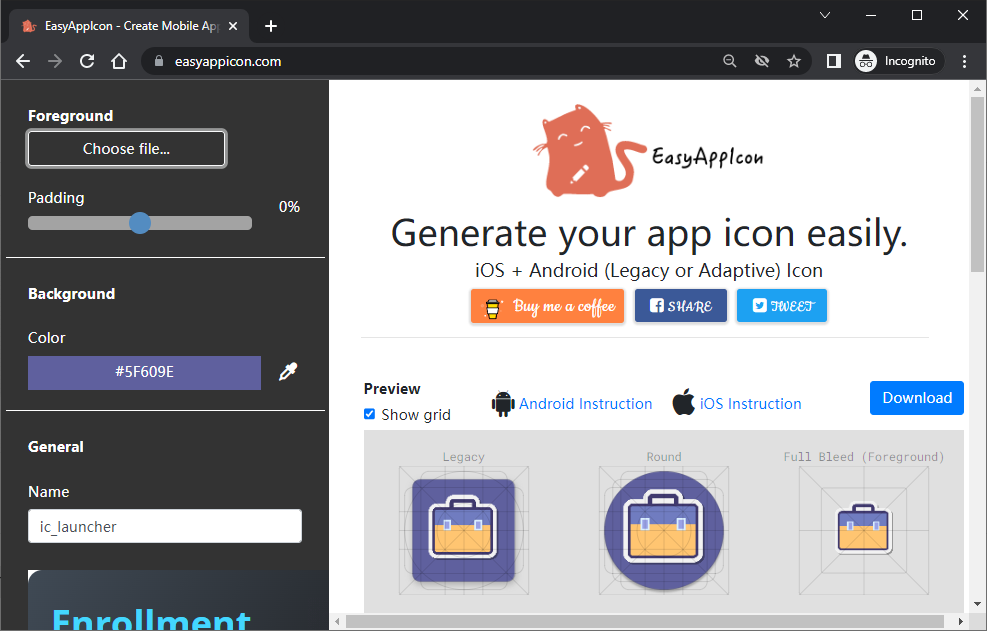
Close Android Studio, and go to this website (App Icon Generators):
Upload your favorite icon to the website and it will generate various sizes of App Icons for building your Android project.
*Acknowledgement: Thanks to [icons8.com] for sponsoring the icon used in this article.
Download the generated icons.
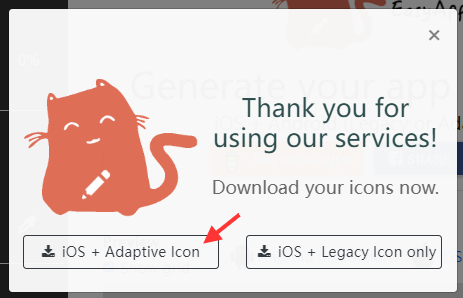
Extract the zip content and copy from the Android’s icon set folder:
zip extracted content folder...\android\To the project icon resource folder:
project_folder...\<project name>\app\src\main\res\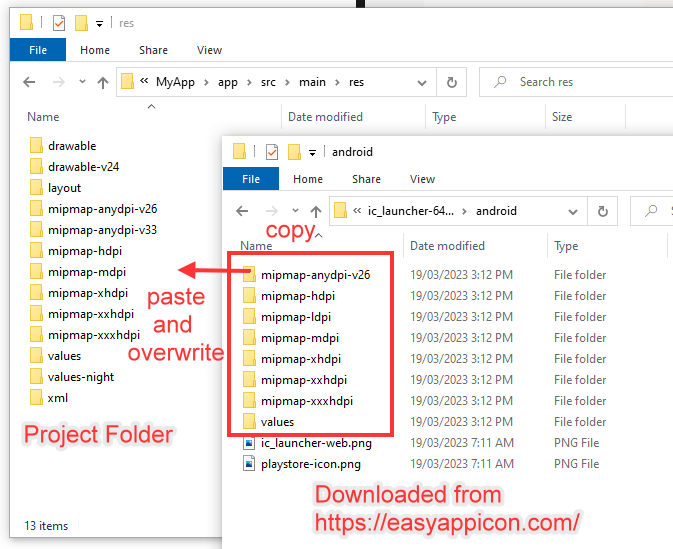
Reopen Android Studio and the project.
Now, the project has 2 sets of icons.
- Set 1: Downloaded from easyappicon.com
- Set 2: Original default icons added by Android Studio
This resulting duplicates icon existed in the project which will cause build error. Therefore, we need to delete the default icons added by Android Studio.
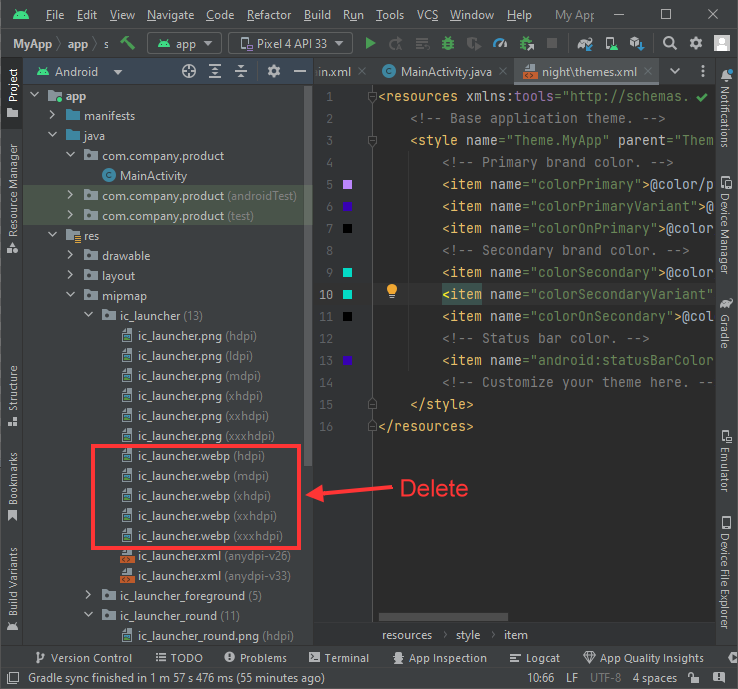
Go to the folder:
app > res > mipmap > ic_launcherand delete all *.webp files
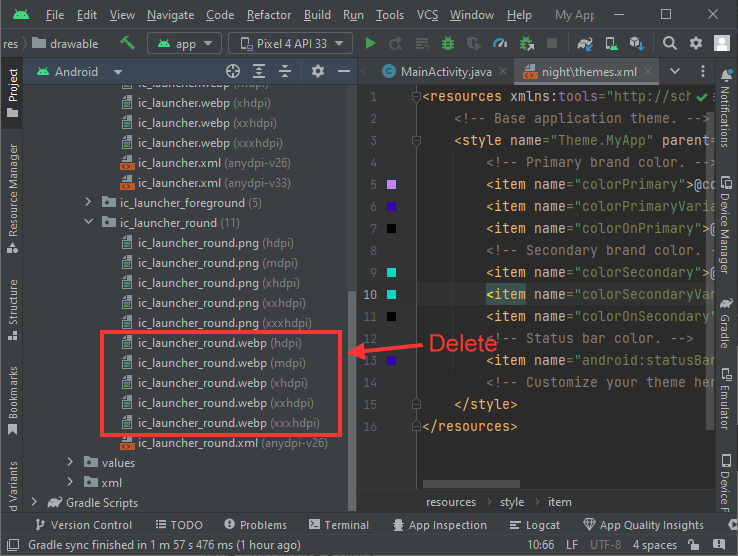
and go to another folder:
app > res > mipmap > ic_launcher_roundand delete all *.webp files
At the folder [ app > res > drawable ], delete the following files:
ic_launcher_background.xmlic_launcher_foreground.xml
And replace with your own edited PNG images:
ic_launcher_background.pngic_launcher_foreground.png
For more info on changing the App Icons, please refer to the following Android Developer Documentation:
Setup the Layout
Next, edit the “ActionBar“. Open the following theme files:
app > res > values > themes.xml
app > res > values > themes.xml (night)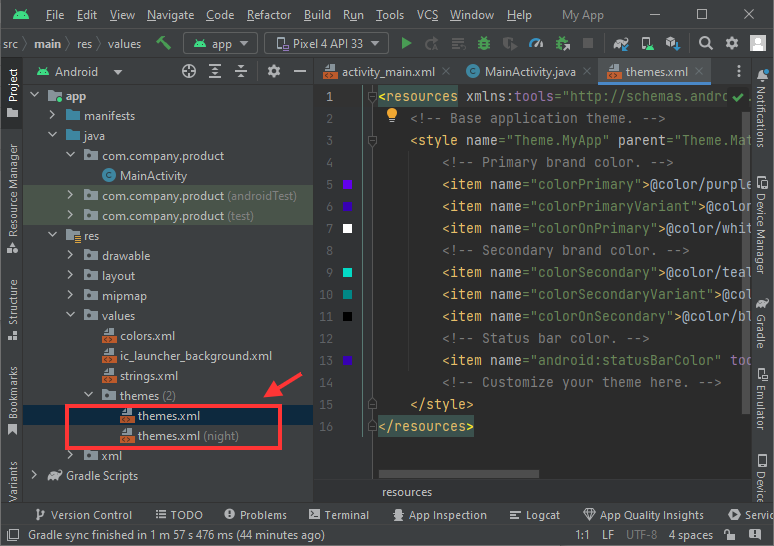
Change both files of this line: (from DarkActionBar)
<style name="Theme.MyApp" parent="Theme.MaterialComponents.DayNight.DarkActionBar">To (NoActionBar)
<style name="Theme.MyApp" parent="Theme.MaterialComponents.DayNight.NoActionBar">After edit, the theme file’s content will look something like this:
<resources xmlns:tools="http://schemas.android.com/tools">
    <!-- Base application theme. -->
    <style name="Theme.MyApp" parent="Theme.MaterialComponents.DayNight.NoActionBar">
        <!-- Primary brand color. -->
        <item name="colorPrimary">@color/purple_200</item>
        <item name="colorPrimaryVariant">@color/purple_700</item>
        <item name="colorOnPrimary">@color/black</item>
        <!-- Secondary brand color. -->
        <item name="colorSecondary">@color/teal_200</item>
        <item name="colorSecondaryVariant">@color/teal_200</item>
        <item name="colorOnSecondary">@color/black</item>
        <!-- Status bar color. -->
        <item name="android:statusBarColor" tools:targetApi="21">?attr/colorPrimaryVariant</item>
        <!-- Customize your theme here. -->
    </style>
</resources>
Next, edit the layout file at:
app > res > layout > activity_main.xmlClick [Code] to view the XML designer code.
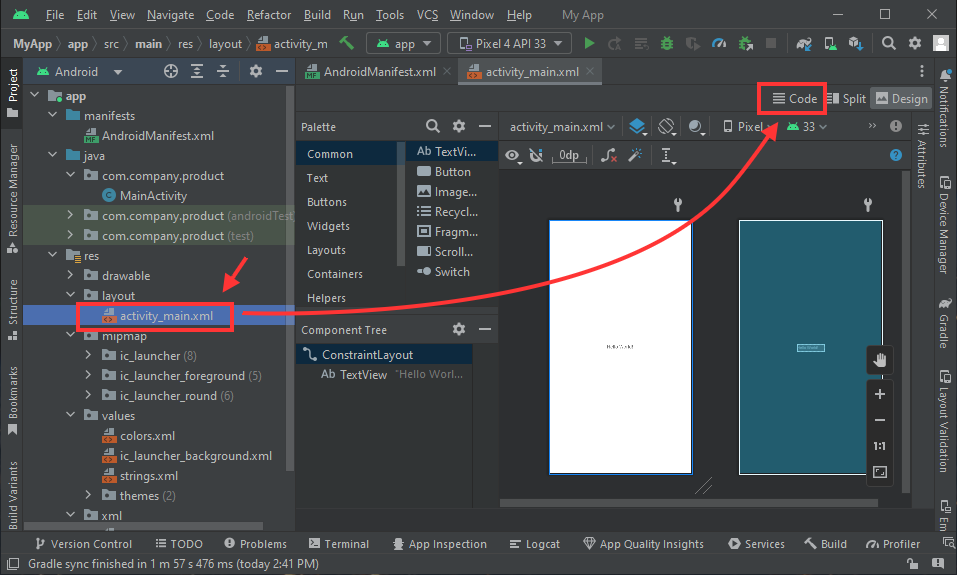
Here’s the initial code:
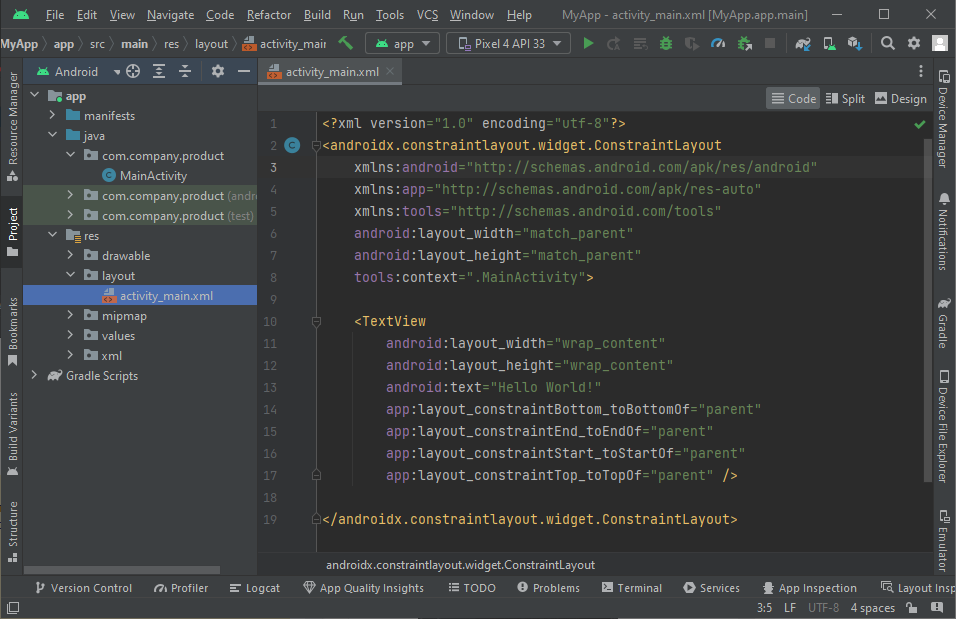
Delete the TextView, and add a WebView.
<?xml version="1.0" encoding="utf-8"?>
<androidx.constraintlayout.widget.ConstraintLayout
        xmlns:android="http://schemas.android.com/apk/res/android"
    xmlns:app="http://schemas.android.com/apk/res-auto"
    xmlns:tools="http://schemas.android.com/tools"
    android:layout_width="match_parent"
    android:layout_height="match_parent"
    tools:context=".MainActivity">

    <WebView
        android:layout_width="match_parent"
        android:layout_height="match_parent"
        android:id="@+id/webView">
    </WebView>

</androidx.constraintlayout.widget.ConstraintLayout>
Change the Layout from
androidx.constraintlayout.widget.ConstraintLayoutto
RelativeLayoutAfter edit, the code will look something like this:
<?xml version="1.0" encoding="utf-8"?>
<RelativeLayout xmlns:android="http://schemas.android.com/apk/res/android"
    xmlns:app="http://schemas.android.com/apk/res-auto"
    xmlns:tools="http://schemas.android.com/tools"
    android:layout_width="match_parent"
    android:layout_height="match_parent"
    tools:context=".MainActivity">

    <WebView
        android:layout_width="match_parent"
        android:layout_height="match_parent"
        android:id="@+id/webView">
    </WebView>

</RelativeLayout>
Setup App Permissions
Next step is to enable the permission for the app to access internet and download/upload files.
Open the android manifest file (AndroidManifest.xml) at:
app > manifest > AndroidManifest.xmlInsert 3 uses-permission request lines
android.permission.INTERNET: Permission to access internet.android.permission.READ_EXTERNAL_STORAGE: able to select files from Android storage (for uploading files)android.permission.WRITE_EXTERNAL_STORAGE: for saving downloaded files
<?xml version="1.0" encoding="utf-8"?>
<manifest xmlns:android="http://schemas.android.com/apk/res/android"
    xmlns:tools="http://schemas.android.com/tools">

    <uses-permission android:name="android.permission.INTERNET"></uses-permission>
    <uses-permission android:name="android.permission.READ_EXTERNAL_STORAGE"></uses-permission>
    <uses-permission android:name="android.permission.WRITE_EXTERNAL_STORAGE"></uses-permission>

    <application
        android:allowBackup="true"
        android:dataExtractionRules="@xml/data_extraction_rules"
        android:fullBackupContent="@xml/backup_rules"
        android:icon="@mipmap/ic_launcher"
        android:label="My App"
        android:supportsRtl="true"
        android:theme="@style/Theme.MyApp"
        tools:targetApi="31">
        <activity
            android:name=".MainActivity"
            android:exported="true">
            <intent-filter>
                <action android:name="android.intent.action.MAIN" />

                <category android:name="android.intent.category.LAUNCHER" />
            </intent-filter>
        </activity>
    </application>

</manifest>
Adding Asset Directory and Files
Right click the folder [app] > New > Directory
Select “src\main\assets“
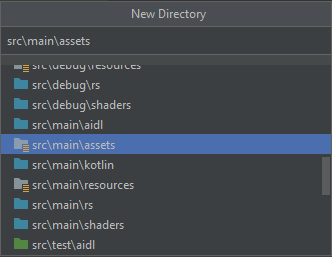
Right click the newly created “assets” folder > New > File
Name the file as “no_internet.html“.
Double click the file and enter some html, for example:
<html>
<head></head>
<body>
<h1>No Internet</h1>
Please check the internet connection.
</body>
</html>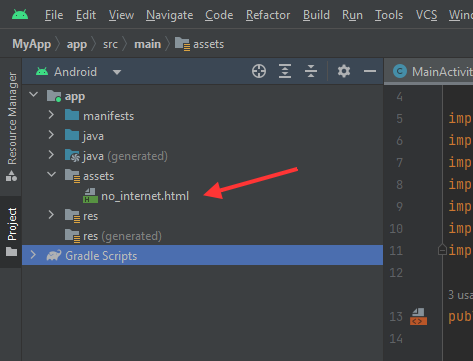
Coding the WebView
Read more: Android Developer Documentation on WebView
Now, we come to the WebView coding part. Open the MainActivity.java file at:
app > java > ..package name... > MainActivity

// example:

app > java > com.company.product > MainActivity
Here’s the initial code:
Import the following class libraries:
import android.annotation.SuppressLint;
import android.app.Activity;
import android.app.ProgressDialog;
import android.content.Intent;
import android.graphics.Bitmap;
import android.net.Uri;
import android.os.Bundle;
import android.webkit.DownloadListener;
import android.webkit.ValueCallback;
import android.webkit.WebChromeClient;
import android.webkit.WebResourceError;
import android.webkit.WebResourceRequest;
import android.webkit.WebSettings;
import android.webkit.WebView;
import android.widget.Toast;

import androidx.appcompat.app.AppCompatActivity;
Declare the objects of WebView, ProgressDialog and a few global variables.
public class MainActivity extends AppCompatActivity {

    // if your website starts with www, exclude it
    private static final String myWebSite = "example.com";

    WebView webView;
    ProgressDialog progressDialog;

    // for handling file upload, set a static value, any number you like
    // this value will be used by WebChromeClient during file upload
    private static final int file_chooser_activity_code = 1;
    private static ValueCallback<Uri[]> mUploadMessageArr;

    @Override
    protected void onCreate(Bundle savedInstanceState) {
        super.onCreate(savedInstanceState);
        setContentView(R.layout.activity_main);

        // initialize the progressDialog
        progressDialog = new ProgressDialog(MainActivity.this);
        progressDialog.setCancelable(true);
        progressDialog.setMessage("Loading...");
        progressDialog.show();

    }
}
Handling web page browsing activities
In the class of MainActivity, create a WebViewClient to handle web browsing activities:
class myWebViewClient extends android.webkit.WebViewClient {

    @Override
    public void onPageStarted(WebView view, String url, Bitmap favicon) {
        super.onPageStarted(view, url, favicon);
        //showing the progress bar once the page has started loading
        progressDialog.show();
    }

    @Override
    public void onPageFinished(WebView view, String url) {
        super.onPageFinished(view, url);
        // hide the progress bar once the page has loaded
        progressDialog.dismiss();
    }

    @Override
    public void onReceivedError(WebView view, WebResourceRequest request, WebResourceError error) {
        super.onReceivedError(view, request, error);
        // show the error message = no internet access
        webView.loadUrl("file:///android_asset/no_internet.html");
        // hide the progress bar on error in loading
        progressDialog.dismiss();
        Toast.makeText(getApplicationContext(),"Internet issue", Toast.LENGTH_SHORT).show();
    }
}
Handling File Upload Activities
File upload will be triggered for the html input type of file:
<html>
<head></head>
<body>
    <form>
        <input type="file" />
    </form>
</body>
</html>
Next, in the class of MainActivity, create a WebChomeClient object to handle file uploading task.
// Calling WebChromeClient to select files from the device
public class myWebChromeClient extends WebChromeClient {
    @SuppressLint("NewApi")
    @Override
    public boolean onShowFileChooser(WebView webView, ValueCallback<Uri[]> valueCallback, FileChooserParams fileChooserParams) {

        Intent intent = new Intent(Intent.ACTION_GET_CONTENT);
        intent.addCategory(Intent.CATEGORY_OPENABLE);

        // set single file type, e.g. "image/*" for images
        intent.setType("*/*");

        // set multiple file types
        String[] mimeTypes = {"image/*", "application/pdf"};
        intent.putExtra(Intent.EXTRA_MIME_TYPES, mimeTypes);
        intent.putExtra(Intent.EXTRA_ALLOW_MULTIPLE, false);

        Intent chooserIntent = Intent.createChooser(intent, "Choose file");
        ((Activity) webView.getContext()).startActivityForResult(chooserIntent, file_chooser_activity_code);

        // Save the callback for handling the selected file
        mUploadMessageArr = valueCallback;

        return true;
    }
}

// after the file chosen handled, variables are returned back to MainActivity
@Override
protected void onActivityResult(int requestCode, int resultCode, Intent data) {
    super.onActivityResult(requestCode, resultCode, data);

    // check if the chrome activity is a file choosing session
    if (requestCode == file_chooser_activity_code) {
        if (resultCode == Activity.RESULT_OK && data != null) {
            Uri[] results = null;

            // Check if response is a multiple choice selection containing the results
            if (data.getClipData() != null) {
                int count = data.getClipData().getItemCount();
                results = new Uri[count];
                for (int i = 0; i < count; i++) {
                    results[i] = data.getClipData().getItemAt(i).getUri();
                }
            } else if (data.getData() != null) {
                // Response is a single choice selection
                results = new Uri[]{data.getData()};
            }

            mUploadMessageArr.onReceiveValue(results);
            mUploadMessageArr = null;
        } else {
            mUploadMessageArr.onReceiveValue(null);
            mUploadMessageArr = null;
            Toast.makeText(MainActivity.this, "Error getting file", Toast.LENGTH_LONG).show();
        }
    }
}
Handling File Download Activities
In the class of MainActivity, create a download event listener:
DownloadListener downloadListener = new DownloadListener() {
    @Override
    public void onDownloadStart(String url, String userAgent, String contentDisposition, String mimetype, long contentLength) {

        progressDialog.dismiss();
        Intent i = new Intent(Intent.ACTION_VIEW);

        // example of URL = https://www.example.com/invoice.pdf
        i.setData(Uri.parse(url));
        startActivity(i);
    }
};
This listener might not able to handle downloads that needs login session.
Initializing WebView
Back to the method of onCreate( ), continue the initialization of WebView:
@Override
protected void onCreate(Bundle savedInstanceState) {
    super.onCreate(savedInstanceState);
    setContentView(R.layout.activity_main);

    // initialize the progressDialog
    progressDialog = new ProgressDialog(MainActivity.this);
    progressDialog.setCancelable(true);
    progressDialog.setMessage("Loading...");
    progressDialog.show();

    // get the webview from the layout
    webView = findViewById(R.id.webView);

    // for handling Android Device [Back] key press
    webView.canGoBackOrForward(99);

    // handling web page browsing mechanism
    webView.setWebViewClient(new myWebViewClient());

    // handling file upload mechanism
    webView.setWebChromeClient(new myWebChromeClient());

    // some other settings
    WebSettings settings = webView.getSettings();
    settings.setJavaScriptEnabled(true);
    settings.setAllowFileAccess(true);
    settings.setAllowFileAccessFromFileURLs(true);
    settings.setUserAgentString(new WebView(this).getSettings().getUserAgentString());

    // set the downlaod listner
    webView.setDownloadListener(downloadListener);

    // load the website
    webView.loadUrl("https://" + myWebSite);
}
Handling [Back] Key Pressed on Android Device:
In the class of MainActivity, add a function to handle [BackPressed]:
@Override
public void onBackPressed() {
    if(webView.canGoBack()){
        webView.goBack();
    } else {
        finish();
    }
}
The code will look something like this: https://github.com/adriancs2/android.webview.upload.download/blob/main/src/app/src/main/java/com/company/product/MainActivity.java
Full source code is available at the top of this article.
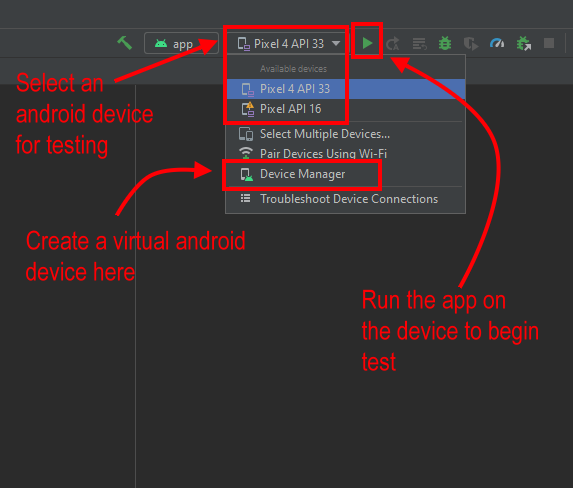
Finally, let’s test out the app.
To distribute it, you may build it as APK. At menu, go to [Build] > [Generate Signed Bundle / APK…] > select [APK] and follow on screen instructions.
To build for uploading to Google PlayStore, you may select [Android App Bundle] and then follow on screen instructions.
Thank you and happy coding.
Alternatives
*Acknowledge: Feature/Thumbnail Image is provided by Denny Müller at Unsplash.com.