The idea is to build a project in .NET Core and publish it as Linux package.
MySqlBackup.NET is an open source .NET Library (C#/VB.NET) to backup & restore MySQL database.
Here, we’re looking into how MySqlBackup.NET can be run on CentOS/Linux to perform backup & restore of MySQL database.
We can test this out with a simple Console App.
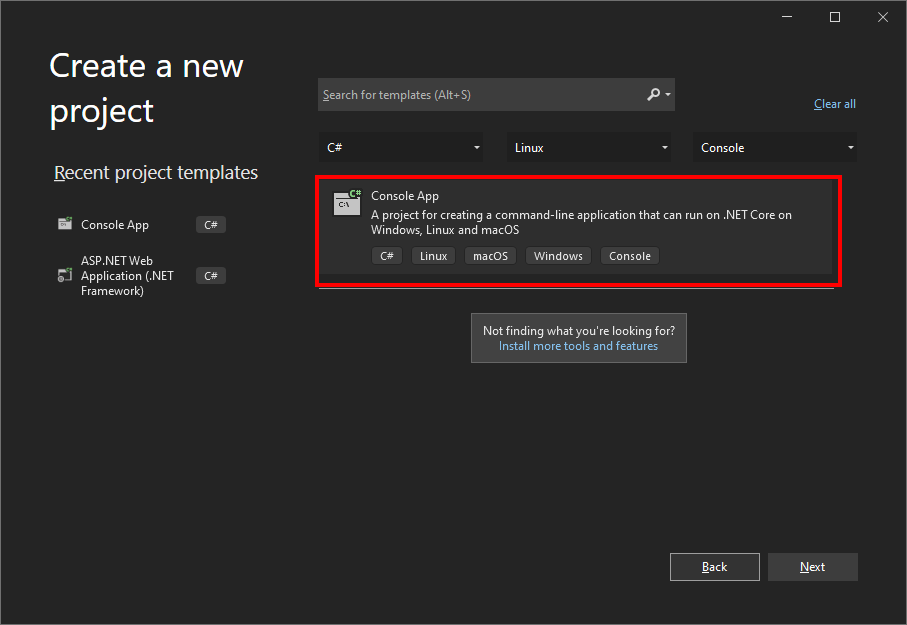
Starts by creating a .net core Console linux project:

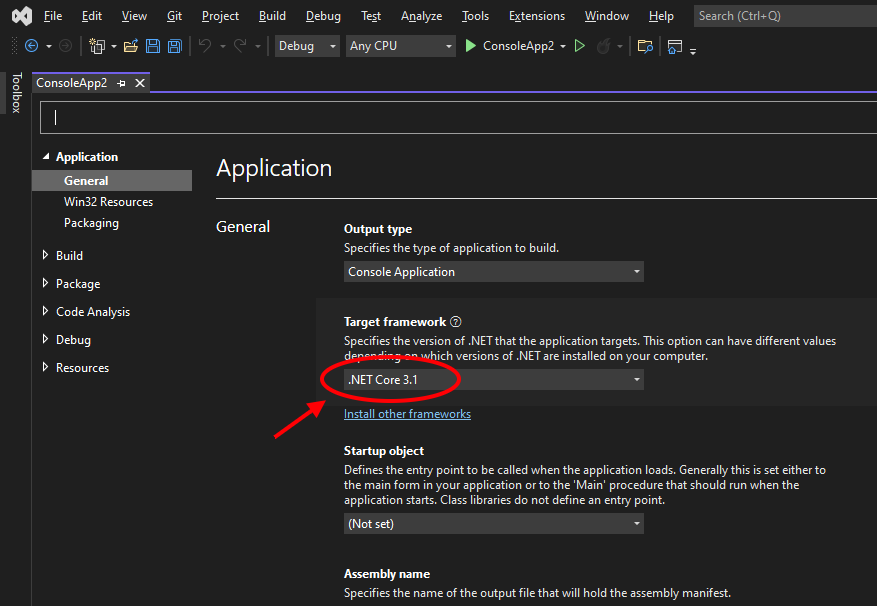
Check the project properties, ensure the project is built with .NET Core framework:
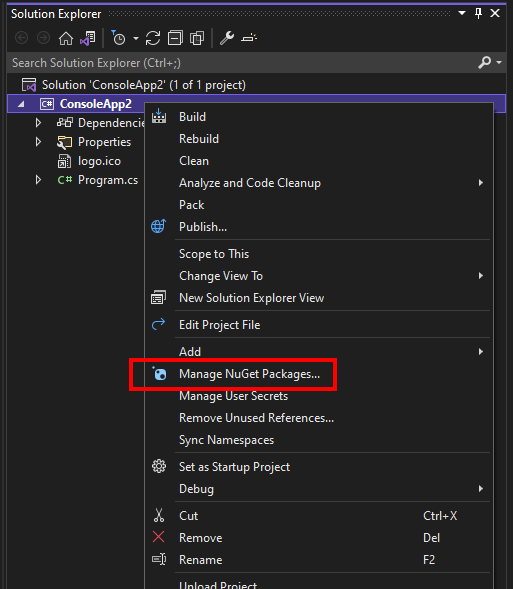
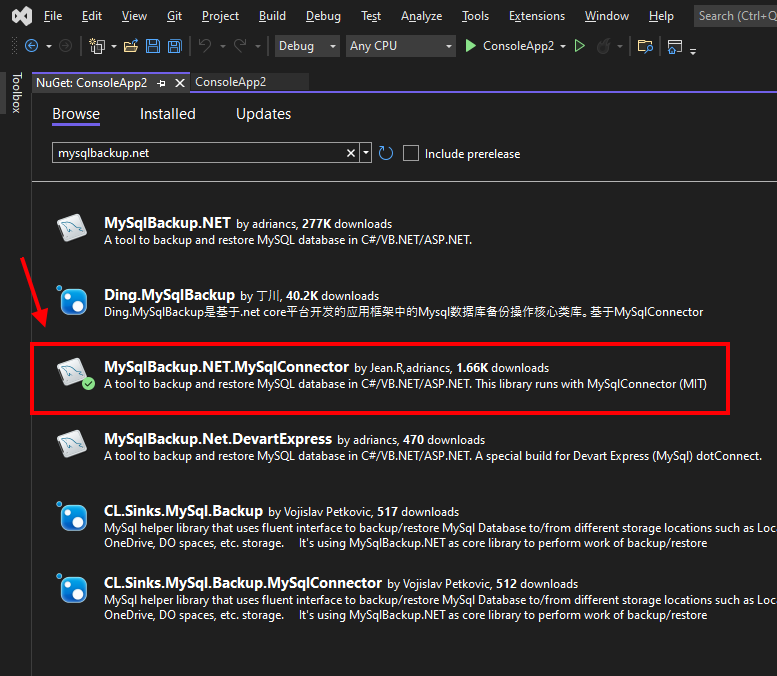
Install Nuget Package of MySqlBackup.NET (with MySqlConnector):
A simple sample code to test out:
static void Main(string[] args)
{
try
{
Console.WriteLine("Enter the MySQL Connection String: ");
Console.WriteLine();
string constr = Console.ReadLine();
Console.WriteLine();
Console.WriteLine();
Console.WriteLine(("Begin MySQL backup process..."));
string folder = Environment.CurrentDirectory;
string file = Path.Combine(folder, "backup.sql");
using (MySqlConnection conn = new MySqlConnection(constr))
{
using (MySqlCommand cmd = new MySqlCommand())
{
using (MySqlBackup mb = new MySqlBackup(cmd))
{
conn.Open();
cmd.Connection = conn;
mb.ExportToFile(file);
conn.Close();
}
}
}
Console.WriteLine("MySQL backup file saved at: " + file);
}
catch (Exception ex)
{
Console.WriteLine();
Console.WriteLine("Error: " + ex.Message);
}
Console.WriteLine();
Console.WriteLine("Press any key to exit...");
Console.ReadKey();
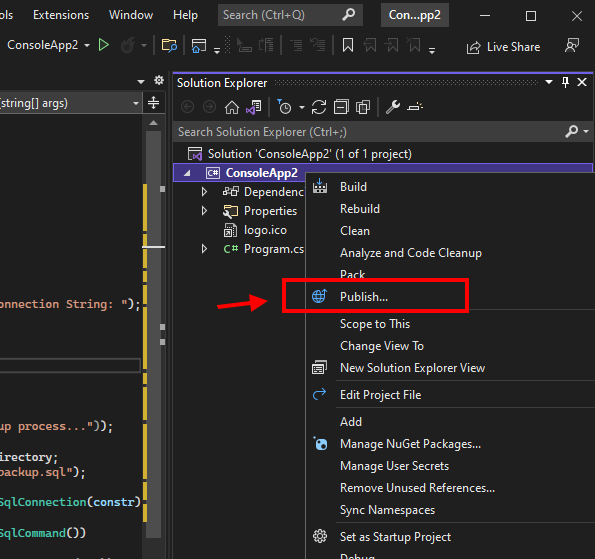
}Next, is to publish the project for .NET Core (Linux):
There two way to build the .NET Core projects for Linux:
- Method 1: Publish the the package with runtime support installed on CentOS
- Method 2: Publish as “self-contained” binary
Method 1: Publish the package with runtime support installed on CentOS
First, publish the project.
Set the target runtime to linux-x64
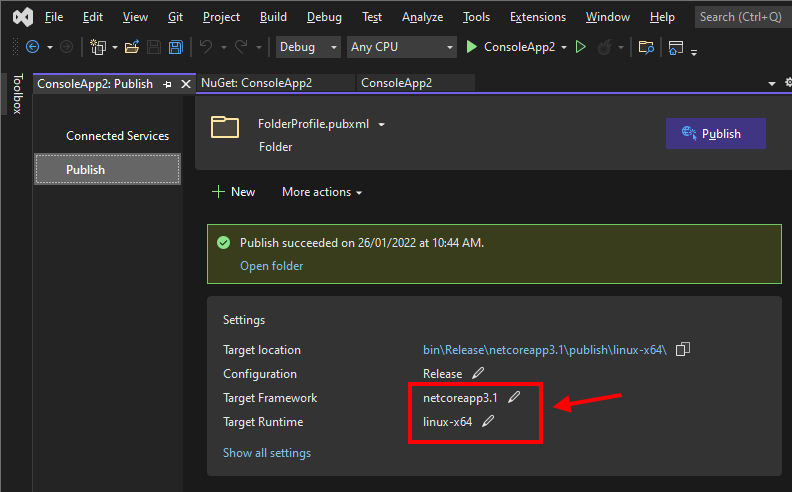
In above example, the Linux compiled binaries are located at:
\bin\Release\netcoreapp3.1\publish\linux-x64Copy the DLL in above folder and paste it to your CentOS
At the CentOS, make sure that you have installed Dotnet runtime by following command:
sudo dnf install dotnet-sdk-<version>For example:
sudo dnf install dotnet-sdk-3.1
sudo dnf install dotnet-sdk-5.0
Assume that you have copied your .NET Core DLL files at the following folder:
/home/<username>/testappThen you can test out your app with following command:
cd /home/admin/testapp
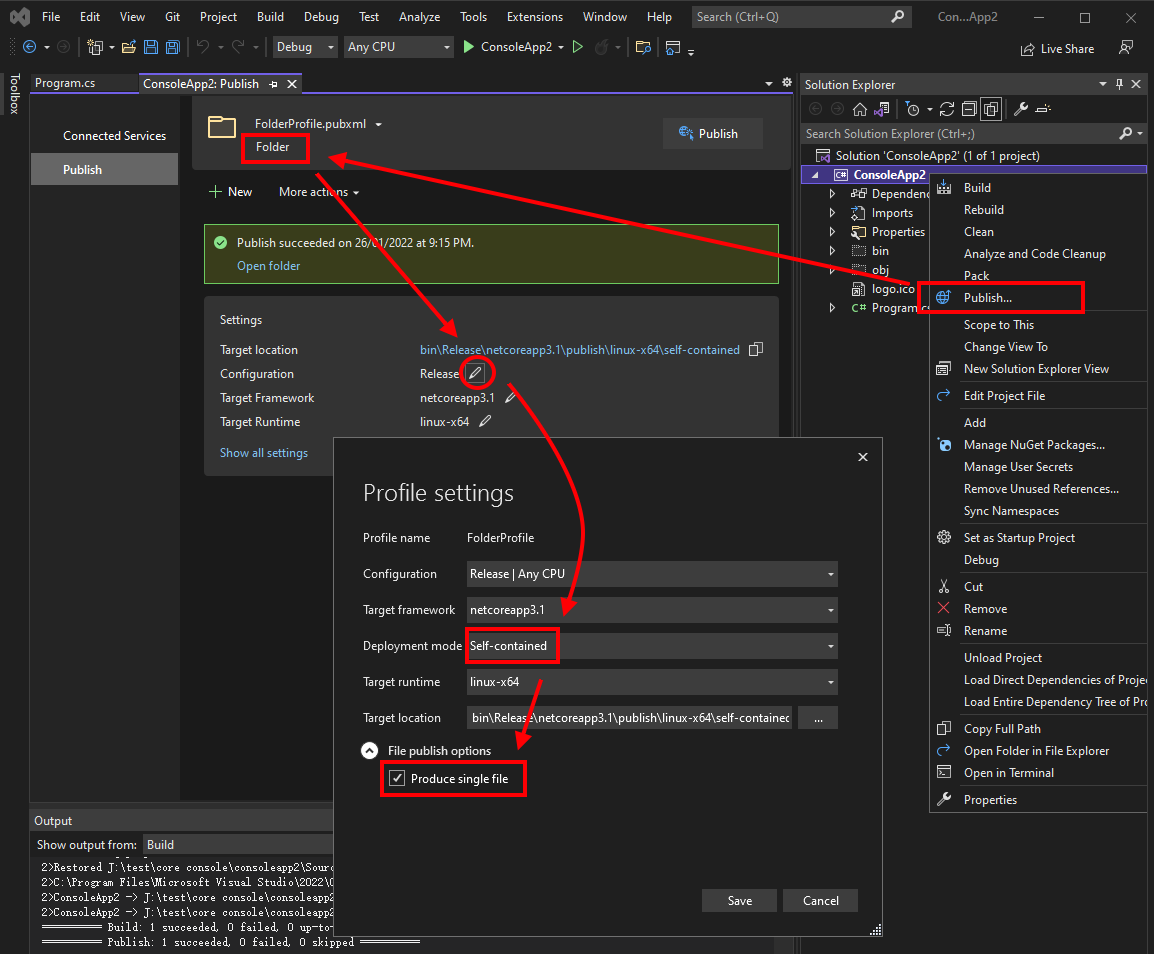
dotnet ConsoleApp.dllMethod 2: Publish as “self-contained” binary
.NET Core App can also be run without installing dotnet runtime, which is by compiling the project into single “self-contained” binary.
Here is the screenshot for publishing the “self-contained” binary:
Here is the example of how it looks like after publishing, there is only 1 single file:
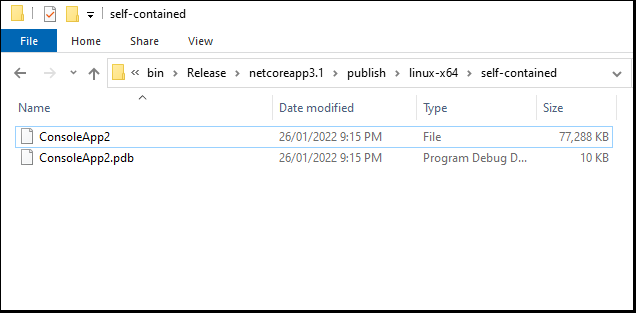
Copy the compiled binary to CentOS
At the terminal, browse to the folder that contains the self-contained binary, for example:
cd /home/admin/testappNext, is to allow execution permission to the file:
sudo chmod 777 ConsoleApp2Run the app:
./ConsoleApp2For more information on publishing “self-contained” binary, read more at:
https://docs.microsoft.com/en-us/dotnet/core/deploying/single-file
Source Code / Sample Project:
Download: https://github.com/MySqlBackupNET/MySqlBackup.Net/files/7938714/ConsoleApp2.zip